Quick Start
Get up and running with Mind Dump by logging into your account, creating your first session and adding your first task in just a few minutes.
Prerequisits
-
A modern web browser like Chrome, Firefox, or Safari
-
A valid email address for account registration
-
A few minutes to set up your first task
Mind Dump is a web-based application, so no downloads or installations are required. Simply use any device with internet access. Mind Dump is designed to work with smaller mobile displays, but the expansive nature of the app will make using smaller screens more challenging. We recommend you usually work on a tablet or PC type computer.
Quick Start: Your First Steps in Mind Dump
Welcome to Mind Dump! This guide will take you step-by-step from your very first login to creating your first task, giving you a quick tour of the workspace along the way.
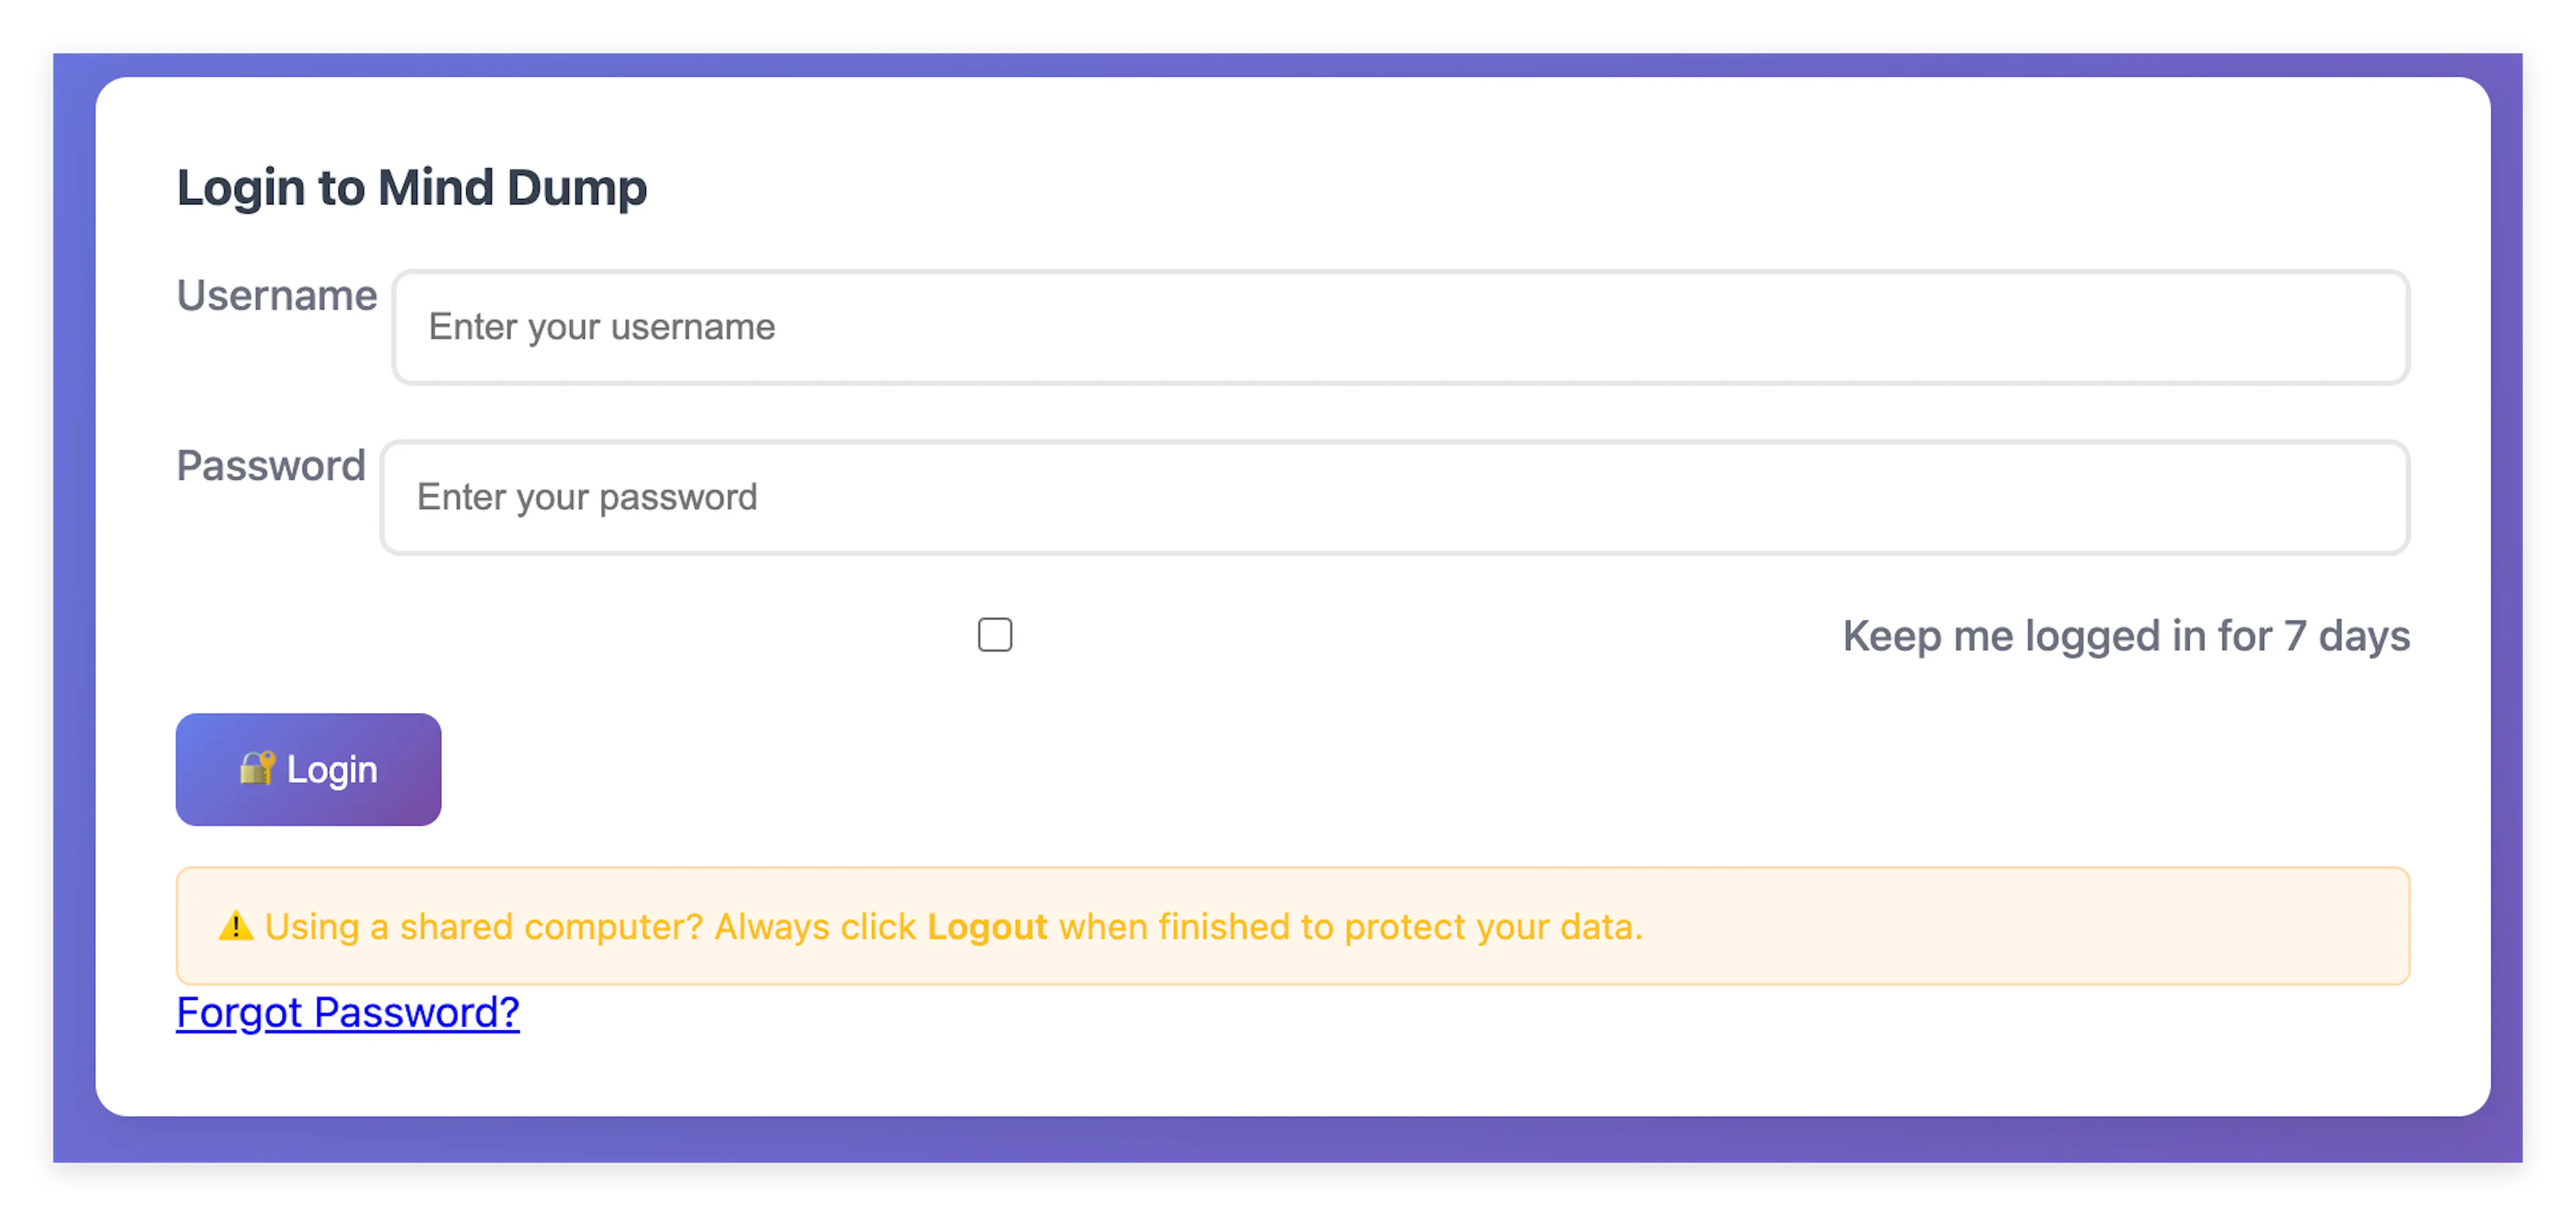
Step 1: Your First Login When you first open the application, you will be greeted by the login window. Simply enter your Username and Password. If you are on a personal device, you can check the "Keep me logged in for 7 days" box so you don't have to sign in every time you visit. Click the Login button to proceed.
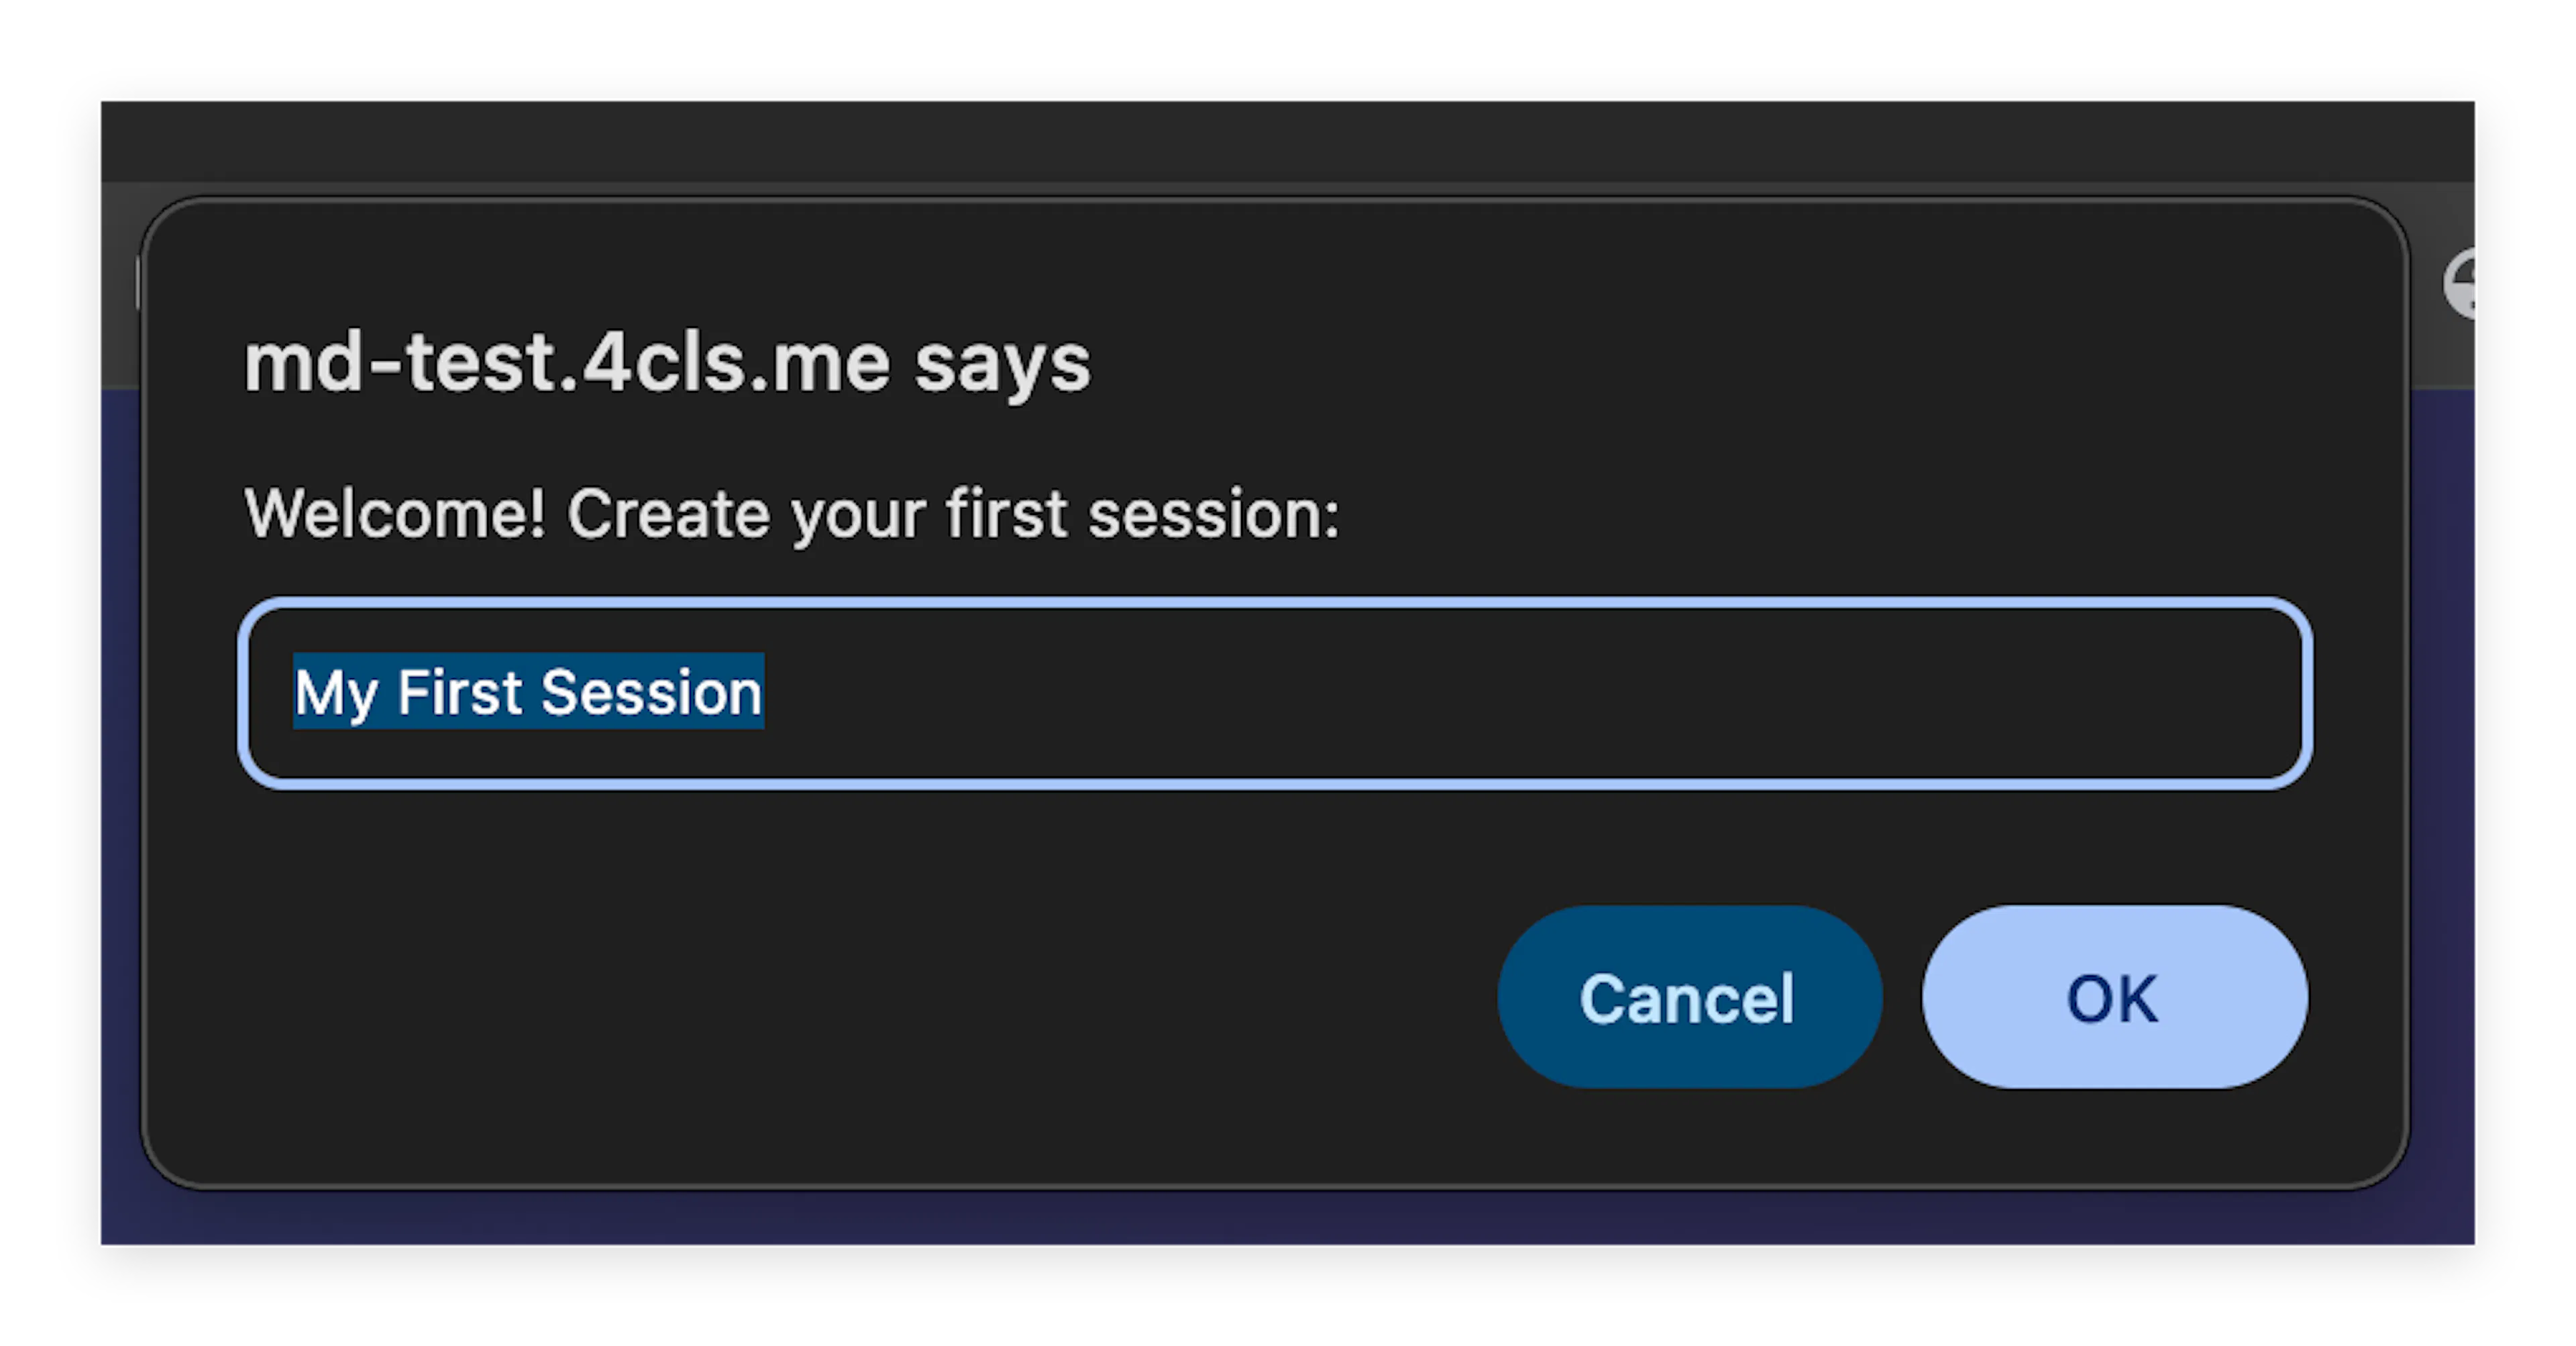
Step 2: Creating Your First Session Immediately after your first successful login, the system will ask you to create your first session, offering the default name "My First Session". You can accept this or type in a different name.
This initial session is created as a basic Date Centric session. "Date Centric" simply means that the session will be ordered and managed by time. This structure is incredibly useful for standard task management functions or any workflow where dates and deadlines are an essential part of the process. Note: Mind Dump supports several other powerful session types—we invite you to look at the dedicated documentation explaining Sessions to learn more (Introducing Sessions). Also please review the Quick Start guide (Creating a Session)
Step 3: Re-Logging In Once your session is created, the screen will clear and you will be asked to log in one more time. Don't worry, this is a usual part of the initial setup process to ensure your new workspace is securely loaded.
Step 4: Exploring the Standard View After logging in again, you will be presented with the Standard View. Let's quickly break down the layout of your screen:
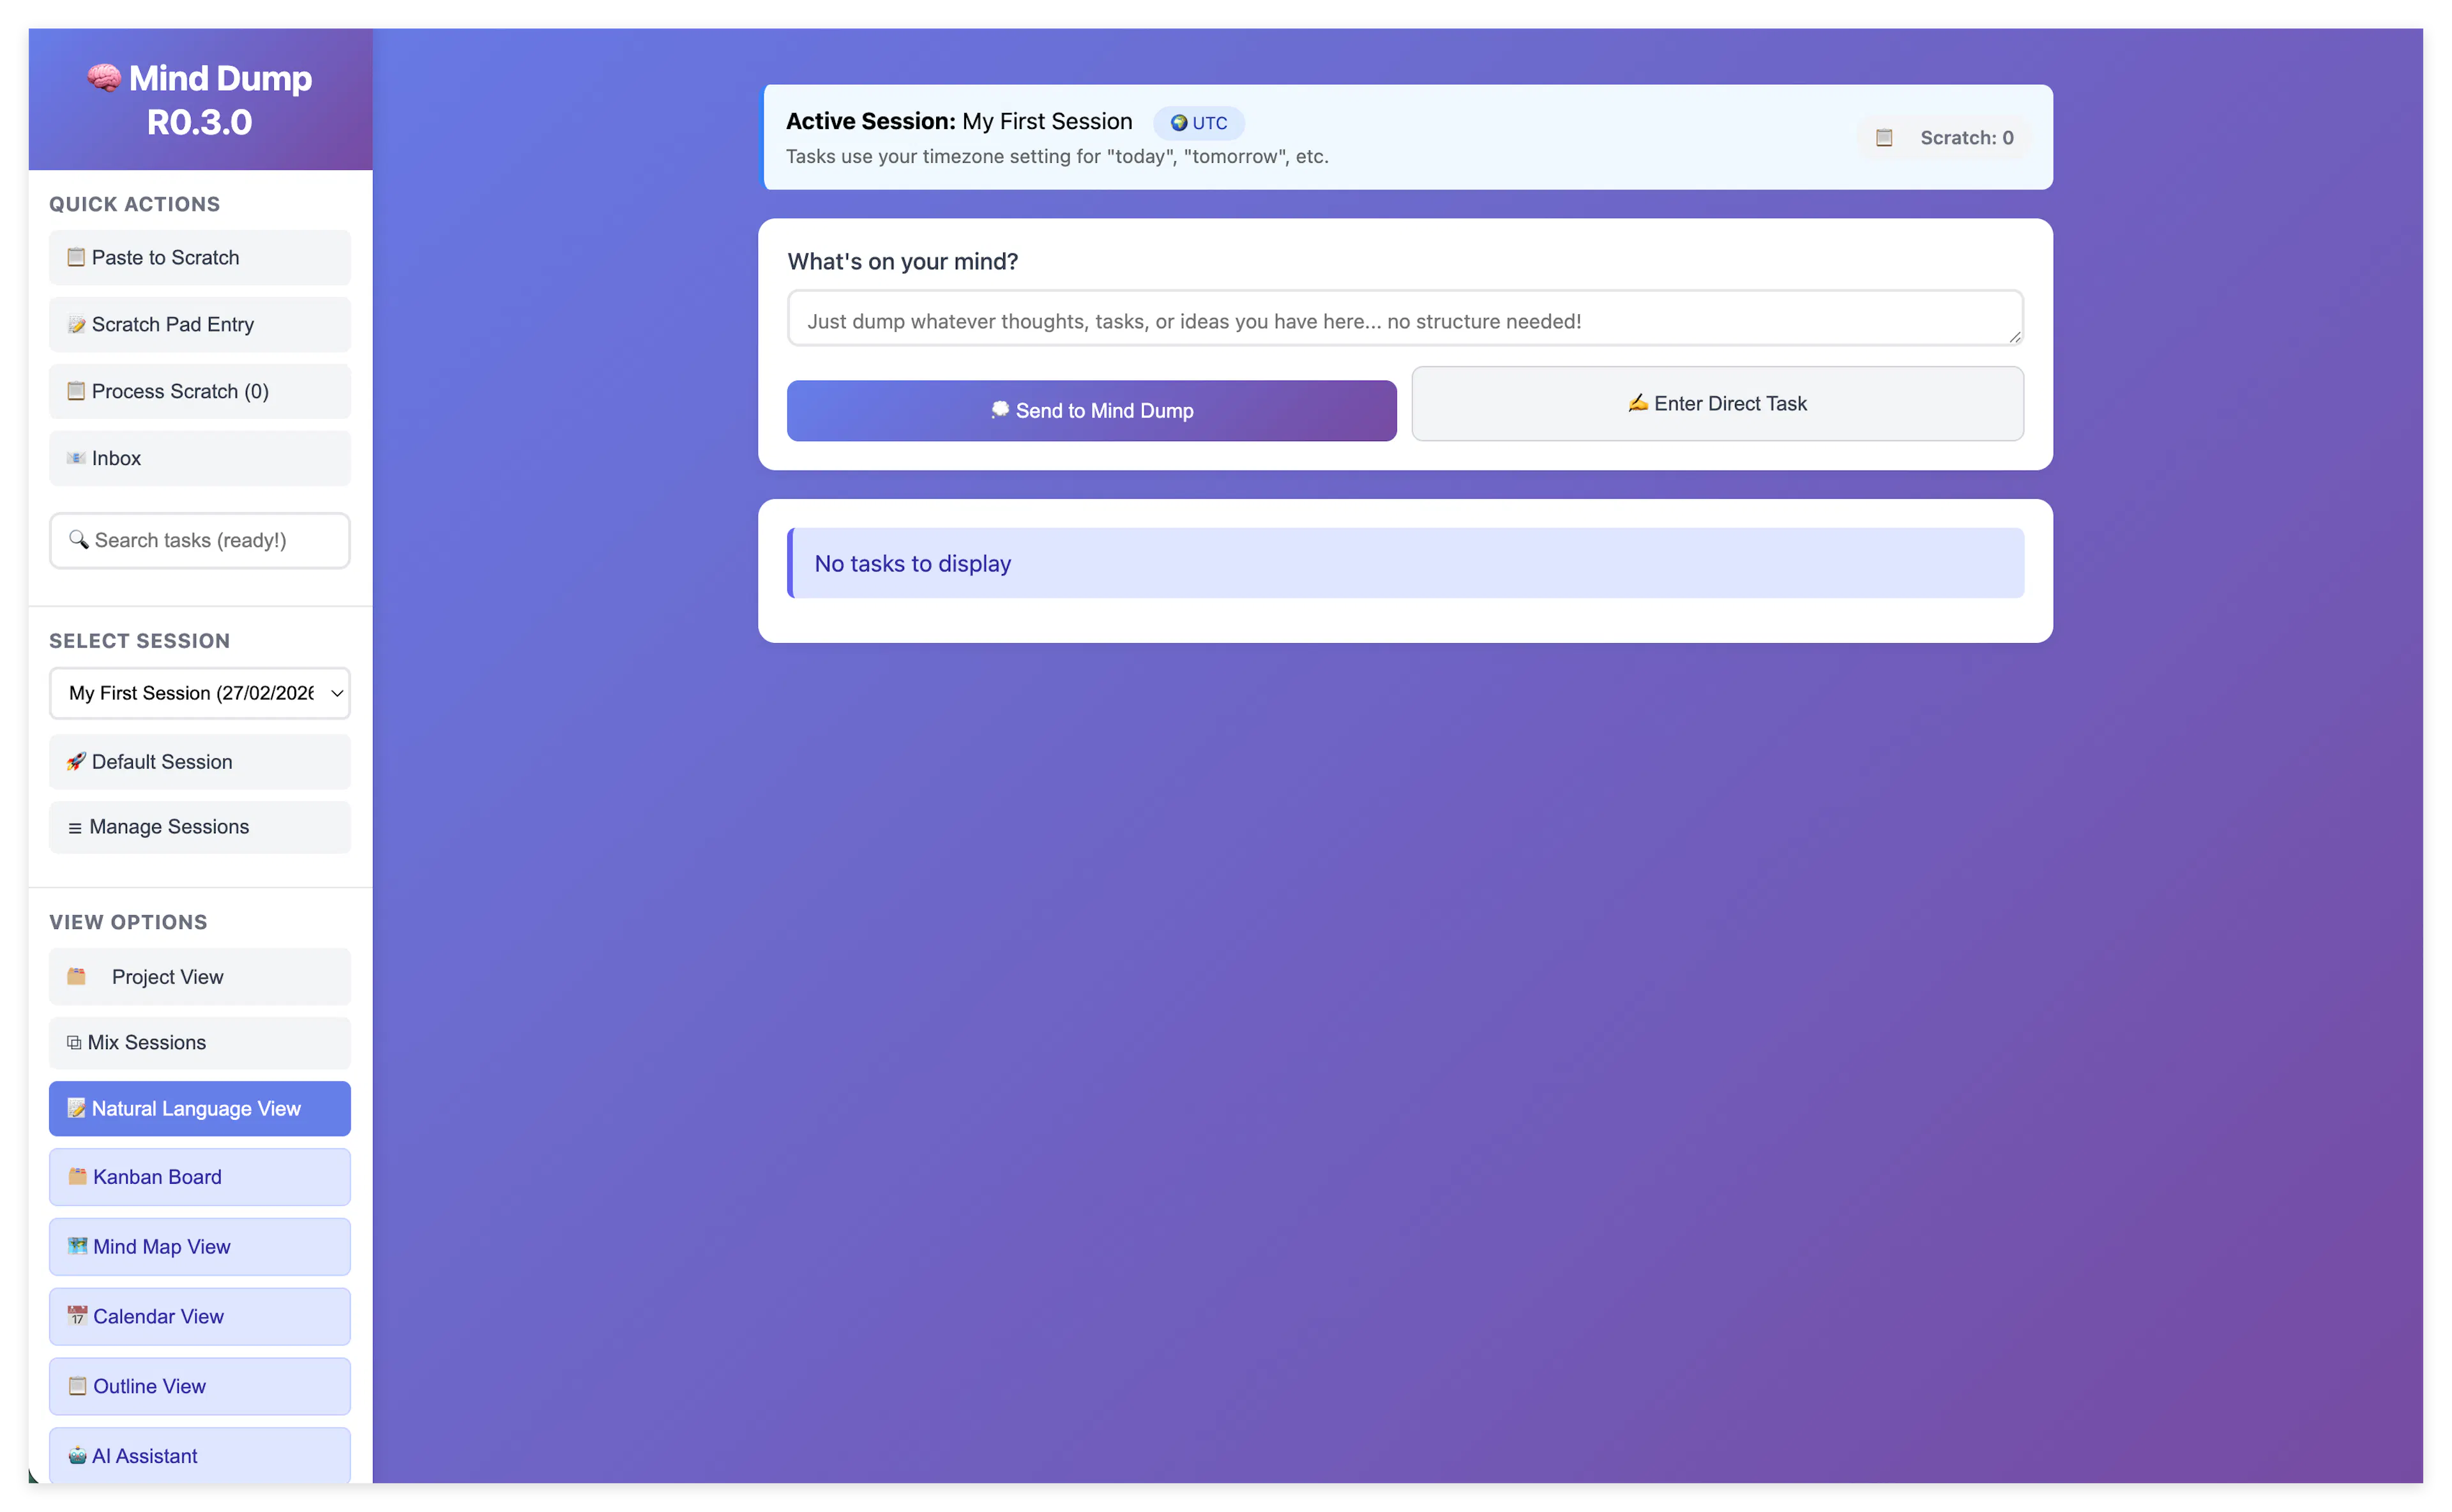
- The Side Bar: Located on the left, this is where many of the app's navigation and view controls are located. We will go through each of these functions later in the documentation.
The Information Bar: Running along the top of the view, this bar changes dynamically during operation to show you important context and information.

-
The Task Entry Bar: Located just below the information bar, this is your primary tool for capturing thoughts. It features:
-
A text entry box that automatically expands when you click into it. This is used for the Artificial Intelligence task entry system, which we will explore in detail later.
-
A "Send To Mind Dump" button, which processes the text you typed using the AI assistant.
-
An "Enter Direct Task" button.
-
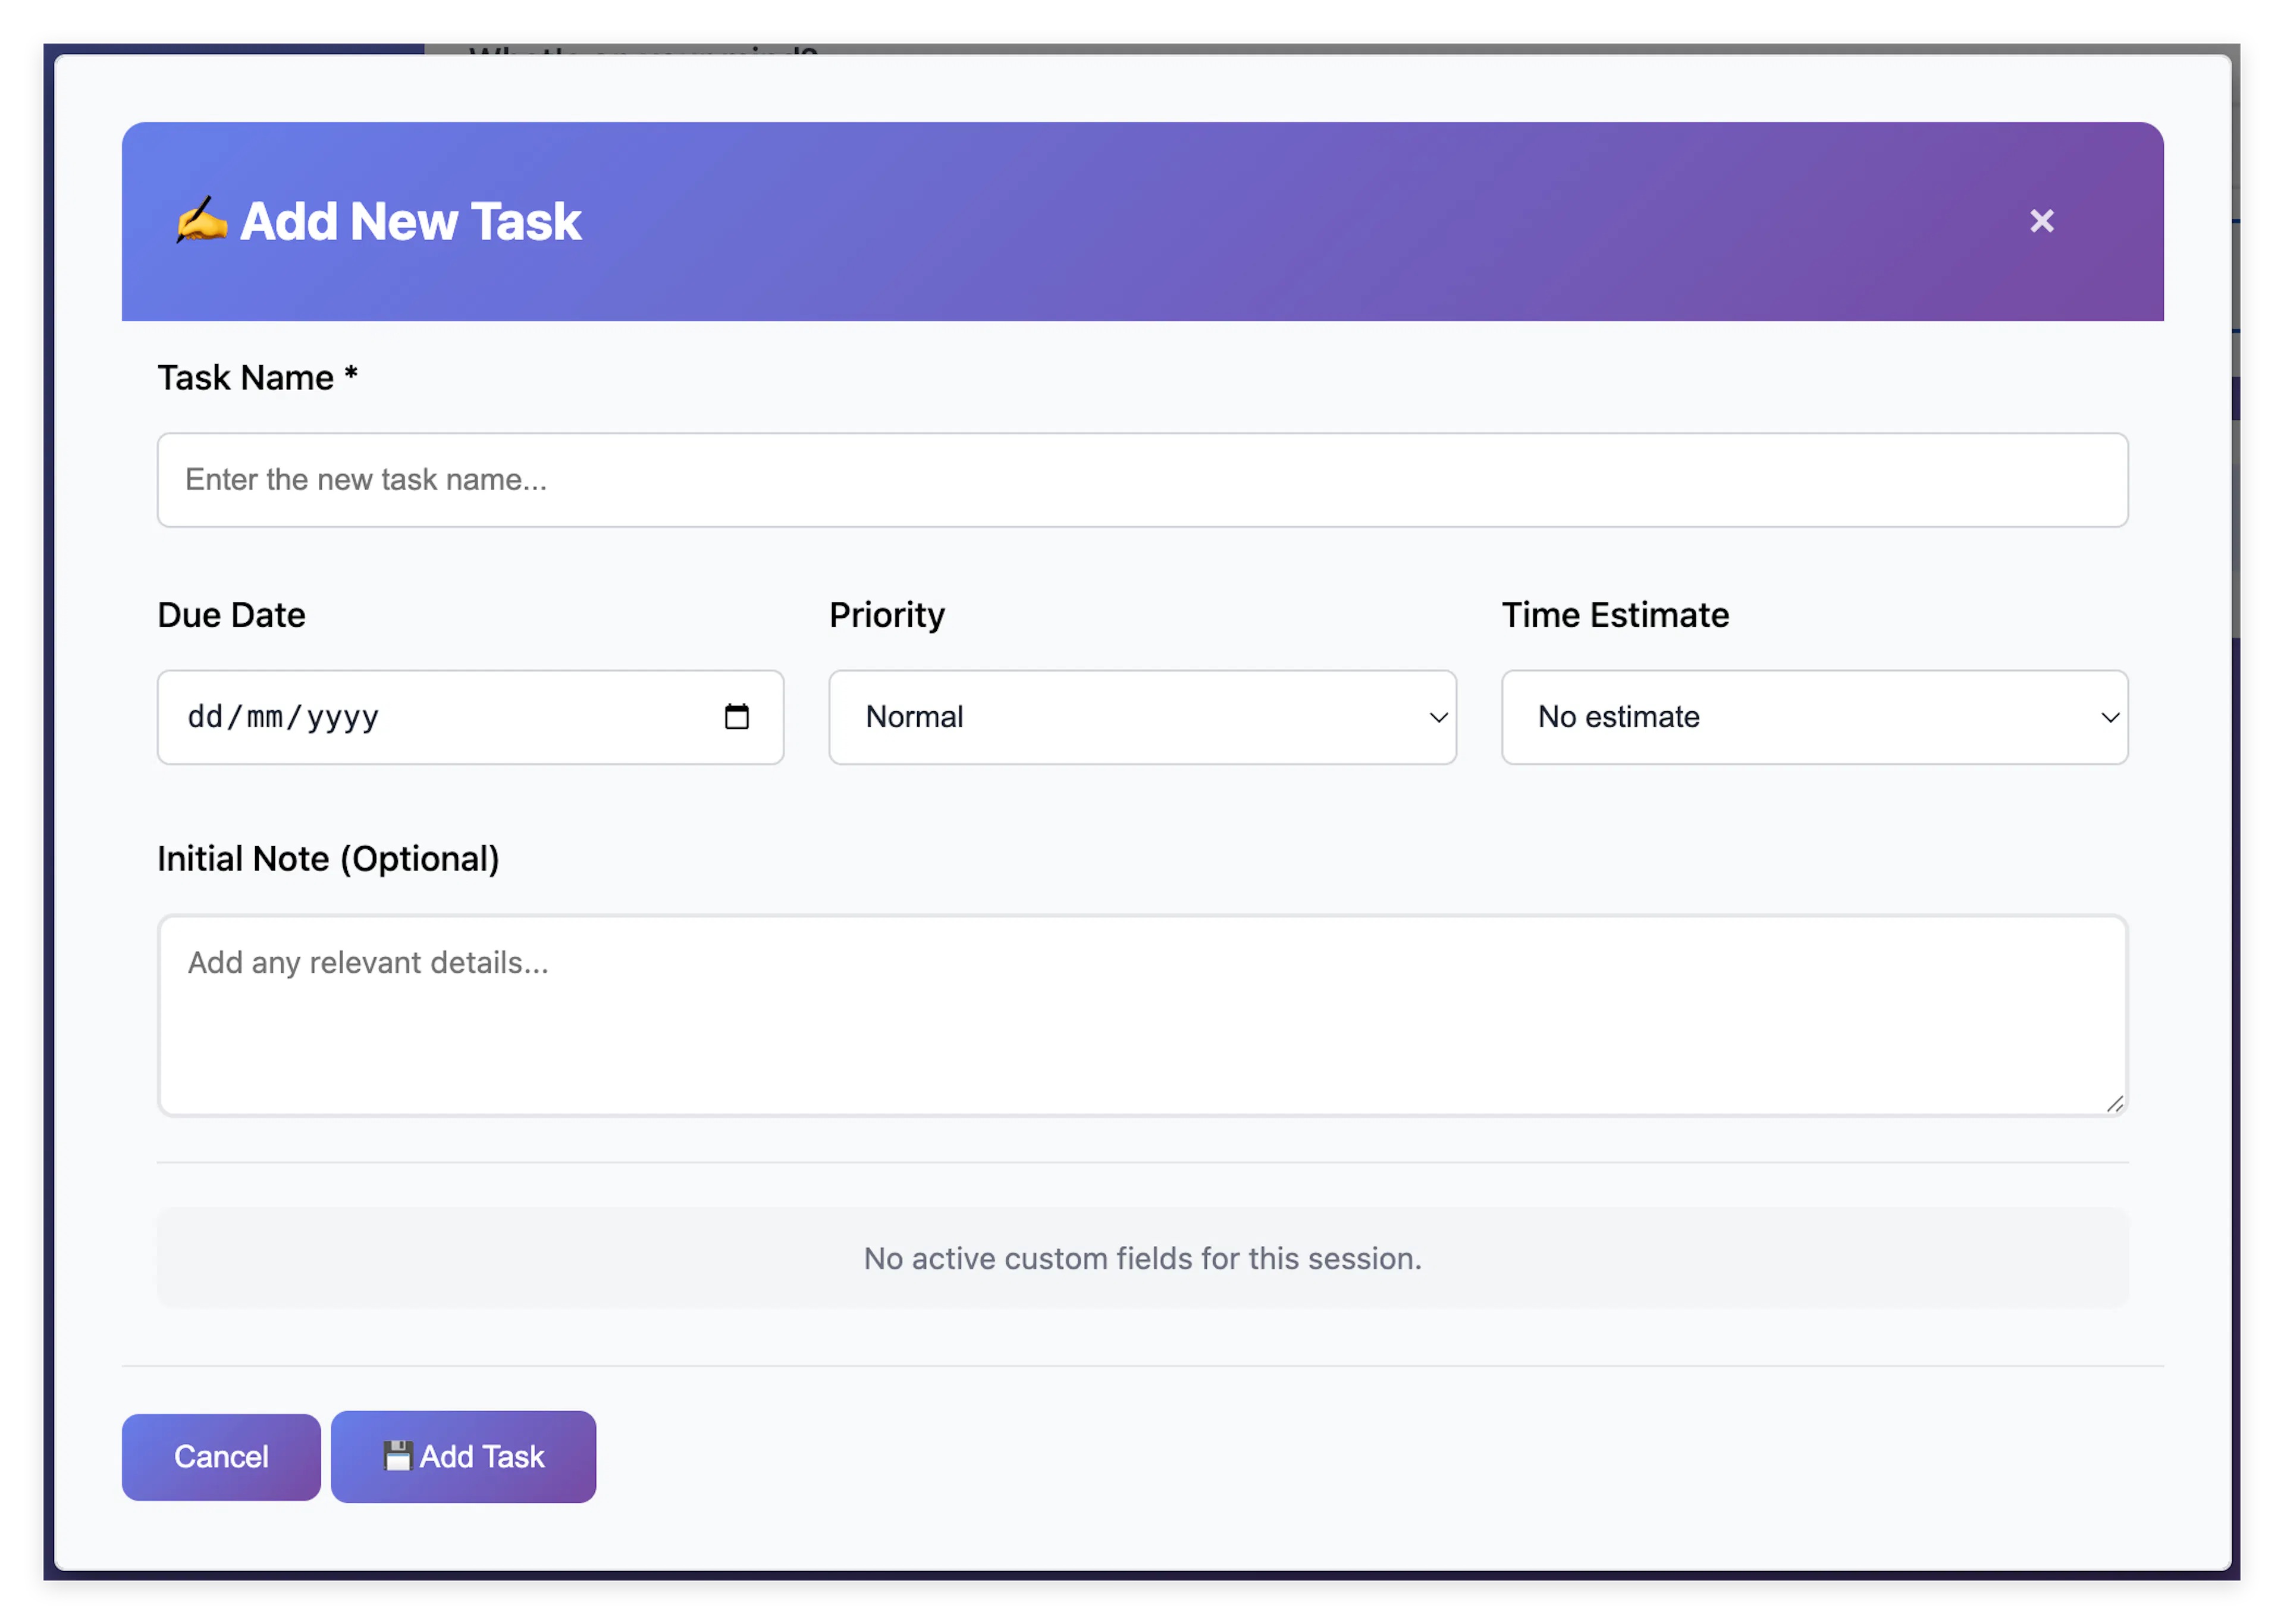
Step 5: Entering Your First Task We are going to enter our first item manually using the direct entry method. Click the Enter Direct Task button.
An entry modal will appear in the center of your screen. Because this session has just been created, it is in its most basic form and includes the following standard fields:
-
Task Name: The name or description of your task. Examples for a Date Centric session might be 'Pick up milk', 'Put the dustbin out', or 'Prepare for the sales meeting'.
-
Due Date: (Optional but recommended for Date Centric Tasks). This is when the task needs to be completed. You can use the provided calendar picker to select a specific day.
-
Priority (Optional) : Allows you to flag a task's level of importance. You can leave it as the default "Normal", or visually highlight it by selecting "🔥 Urgent" or "🟧 Not Urgent".
Learn about Task Urgency Here
-
Time Estimate (Optional): A dropdown menu that lets you predict how long the task will take. Options range from quick 10-minute intervals up to a "Full day".
-
Initial Note (Optional): A larger text area where you can add any extra details, instructions, or expanded thoughts related to the task right from the start.
Once you have filled out your desired fields, simply click the "💾 Add Task" button at the bottom of the modal.
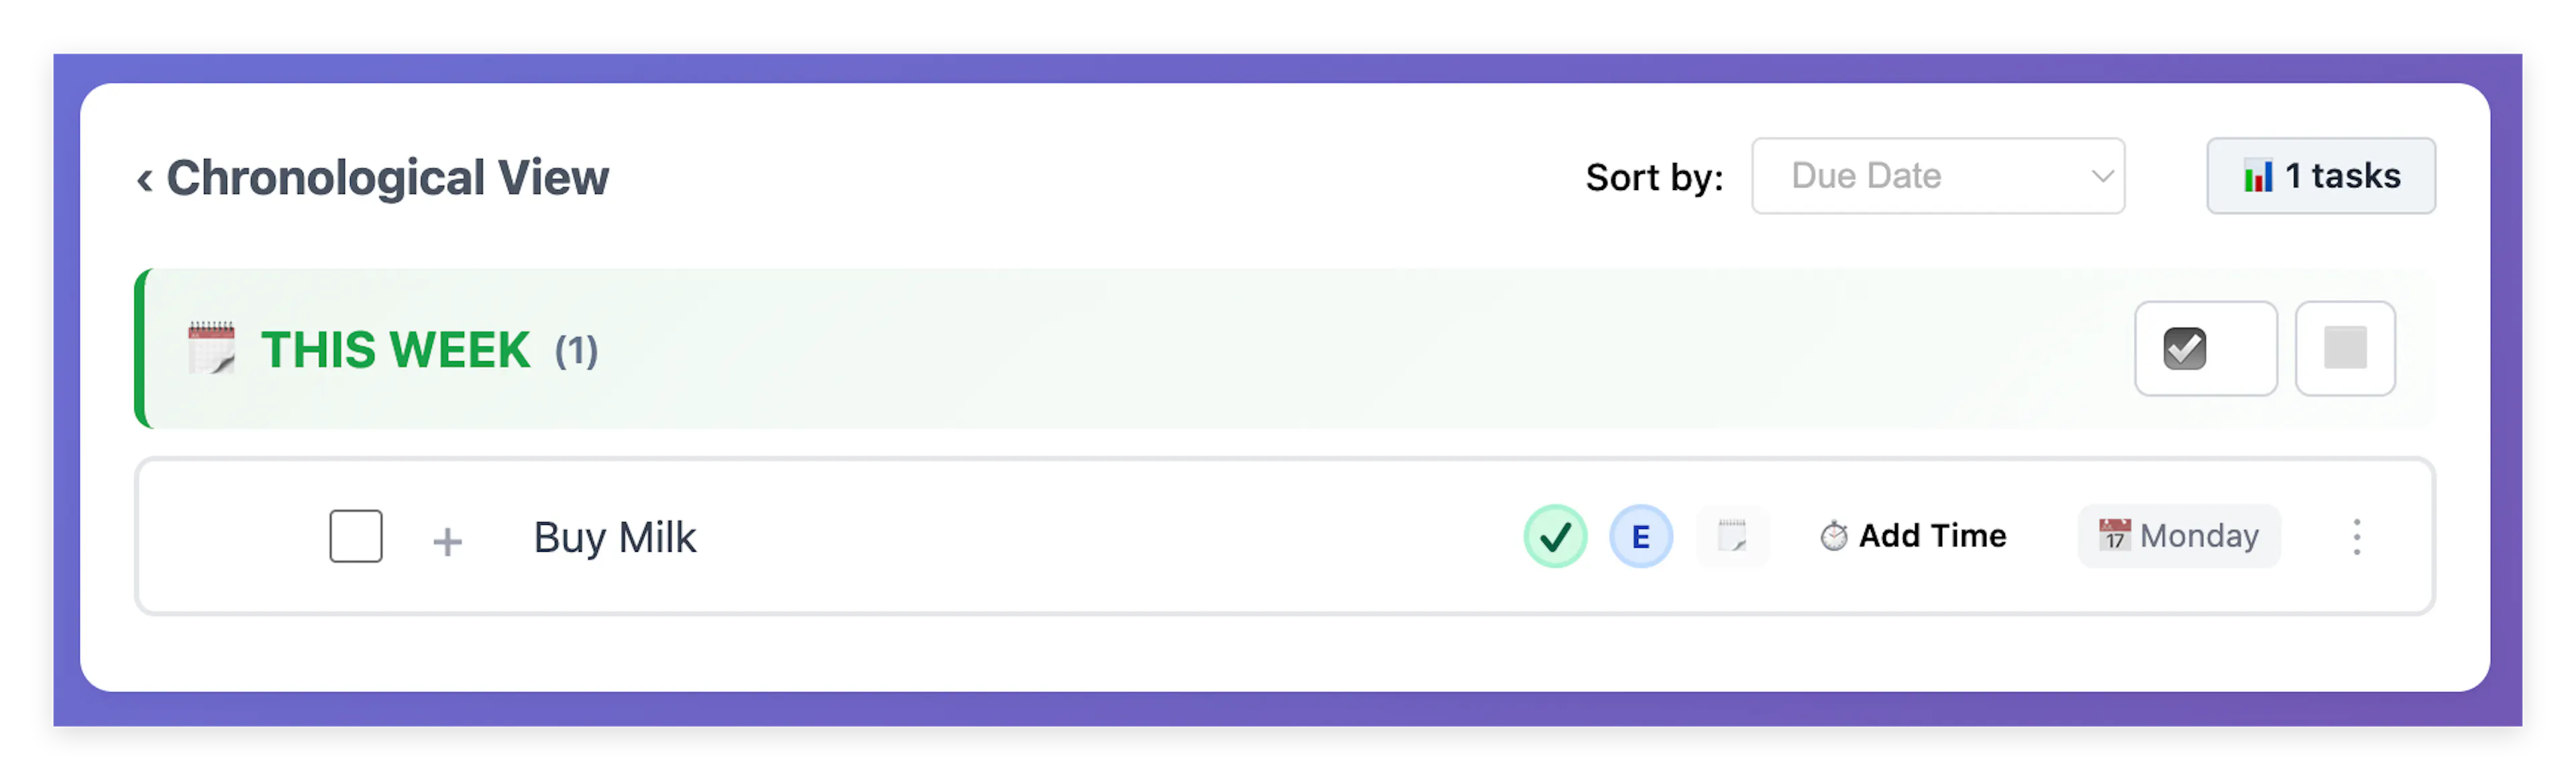
The modal will close, and your newly created task will immediately appear in your Standard View list, ready for you to manage!
-
Quick Start: AI Task Entry
Mind Dump features a powerful artificial intelligence system for task entry.
When you submit a natural language prompt to the AI Assistant, the backend system automatically analyses your intent and routes your request into one of three distinct operational modes. Understanding these modes will help you frame your requests to get the exact output structure you need:
-
Mode A (Task Extraction): This mode is triggered by direct commands or actionable requests (e.g., "Buy milk", "Remind me to call the dentist on Friday"). The AI extracts the core action, interprets any mentioned dates or priority keywords, and prepares a standard task for you to approve.
-
Mode B (List Generation): This mode activates when you explicitly ask the AI to enumerate items (e.g., "List the steps to launch a website", "Name UK Prime Ministers"). Instead of a single task, the system returns a structured checklist, allowing you to select exactly which items you want to convert into individual tasks.
-
Mode C (Generic Content): This acts as the unlimited fallback mode for informational requests, explanations, or creative generation (e.g., "Write a recipe for lasagna", "Explain quantum physics"). The AI provides a free-form text response. You can then copy this text to your clipboard, save the entire output as a new task, or use the conversational interface to ask follow-up questions.
While it is capable of processing highly complex inputs and multiple items at once—which we will explore fully later in the documentation—for now, let's look at its most basic operation: adding a single task with a date and an urgency level.
Quick Start: Single Task Generation (Mode A) The most direct way to use the AI Assistant is for rapid, natural-language task creation. Instead of manually clicking through menus to set dates and priorities, you can simply type your request and let the AI structure it for you.
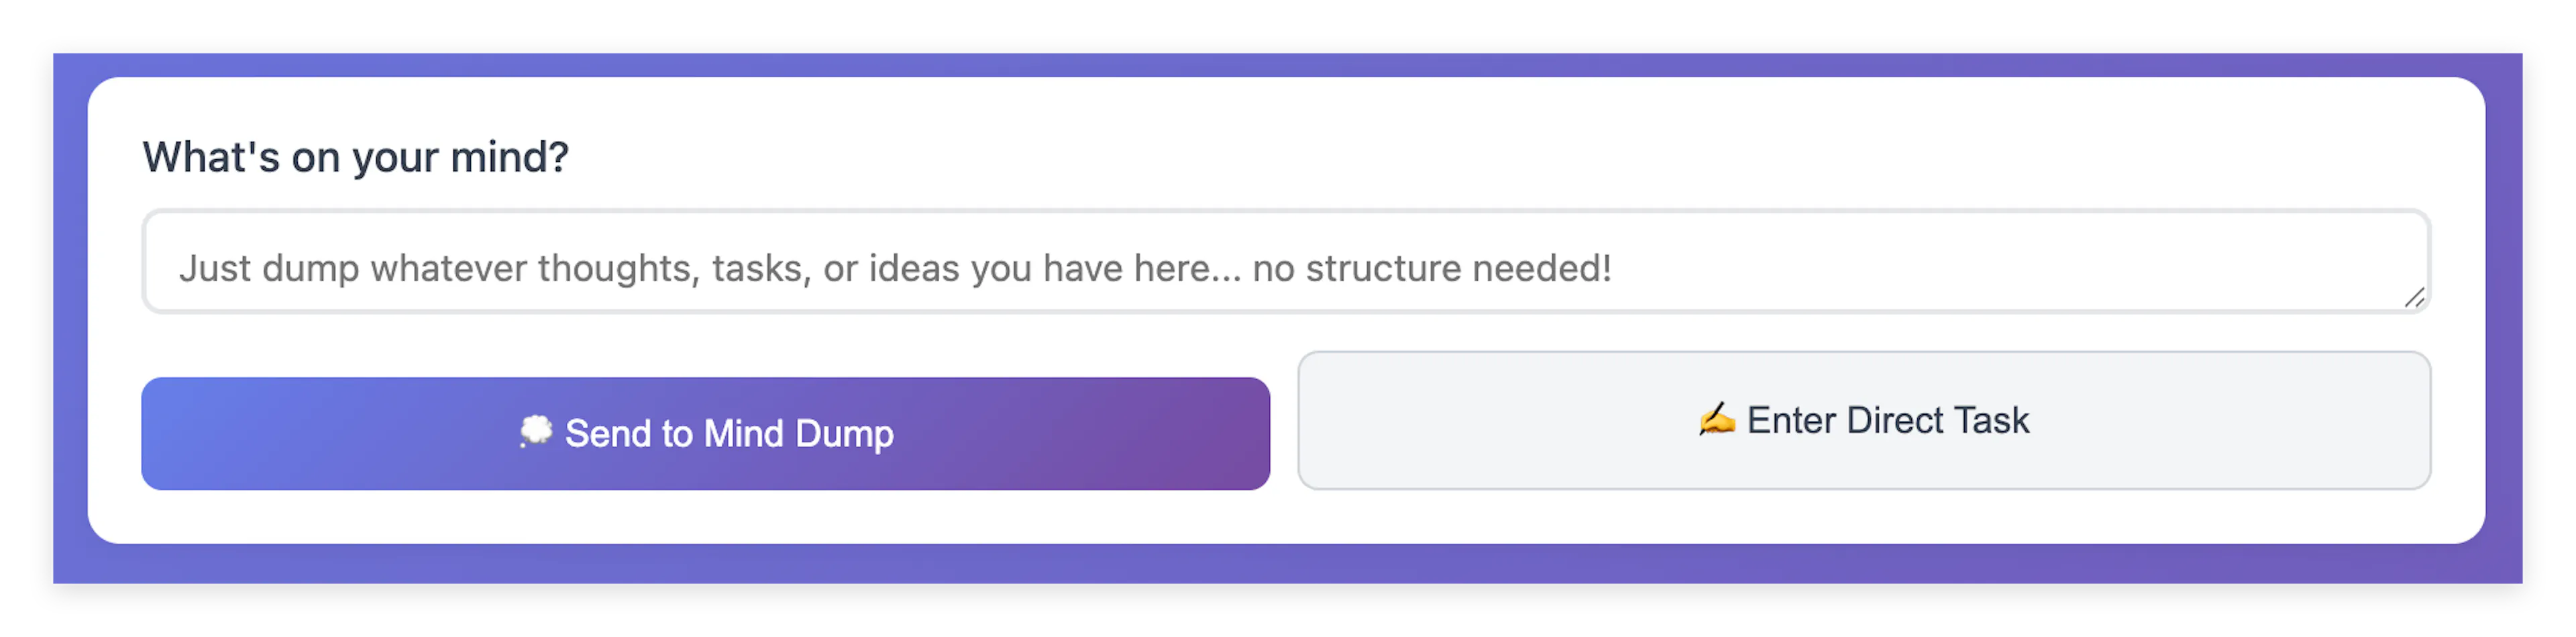
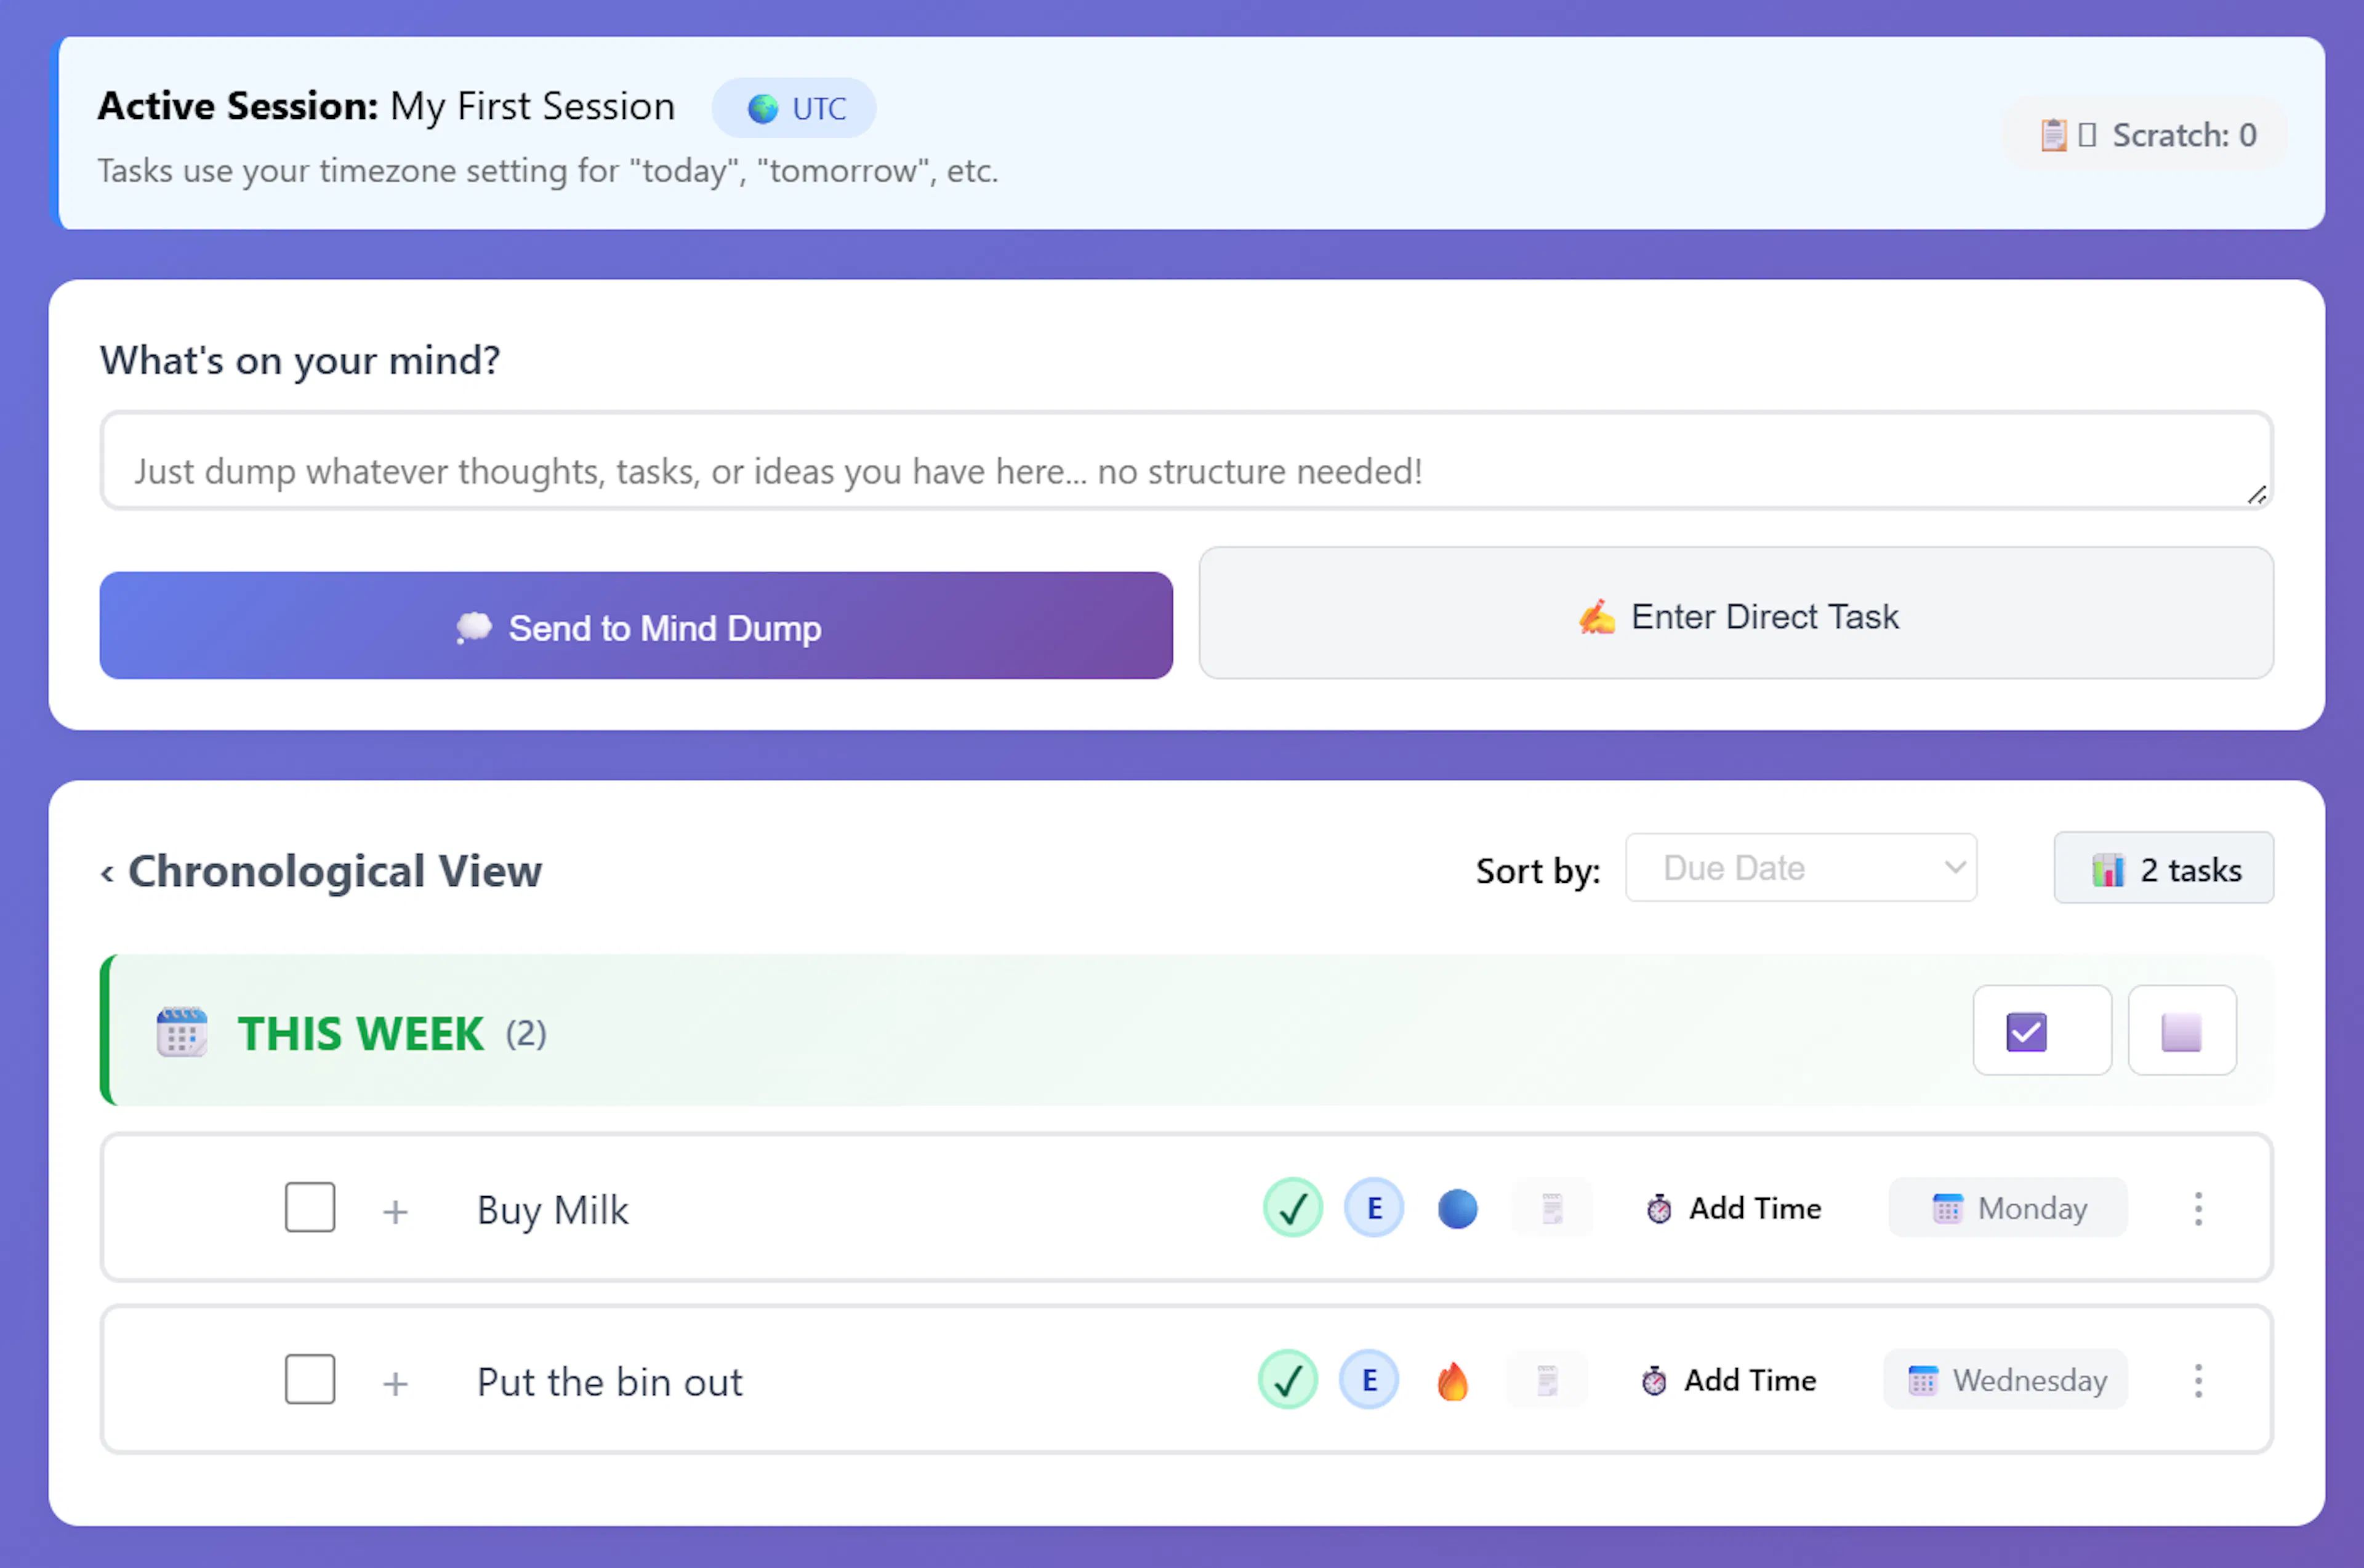
To add a task using the AI assistant, locate the 'What's on your mind?' text box just below the Information Bar. When you click into this text box, it will immediately expand to allow you more space to see your message.
For this example, please enter the following into the text box:
Put the bin out Wednesday urgent

Once entered, click the '💭 Send to Mind Dump' button.
How it Works: This feature works by sending your input securely to the Gemini AI system to extract the exact meaning of your entry. Because the AI is actively analysing your text, the response takes a short time.
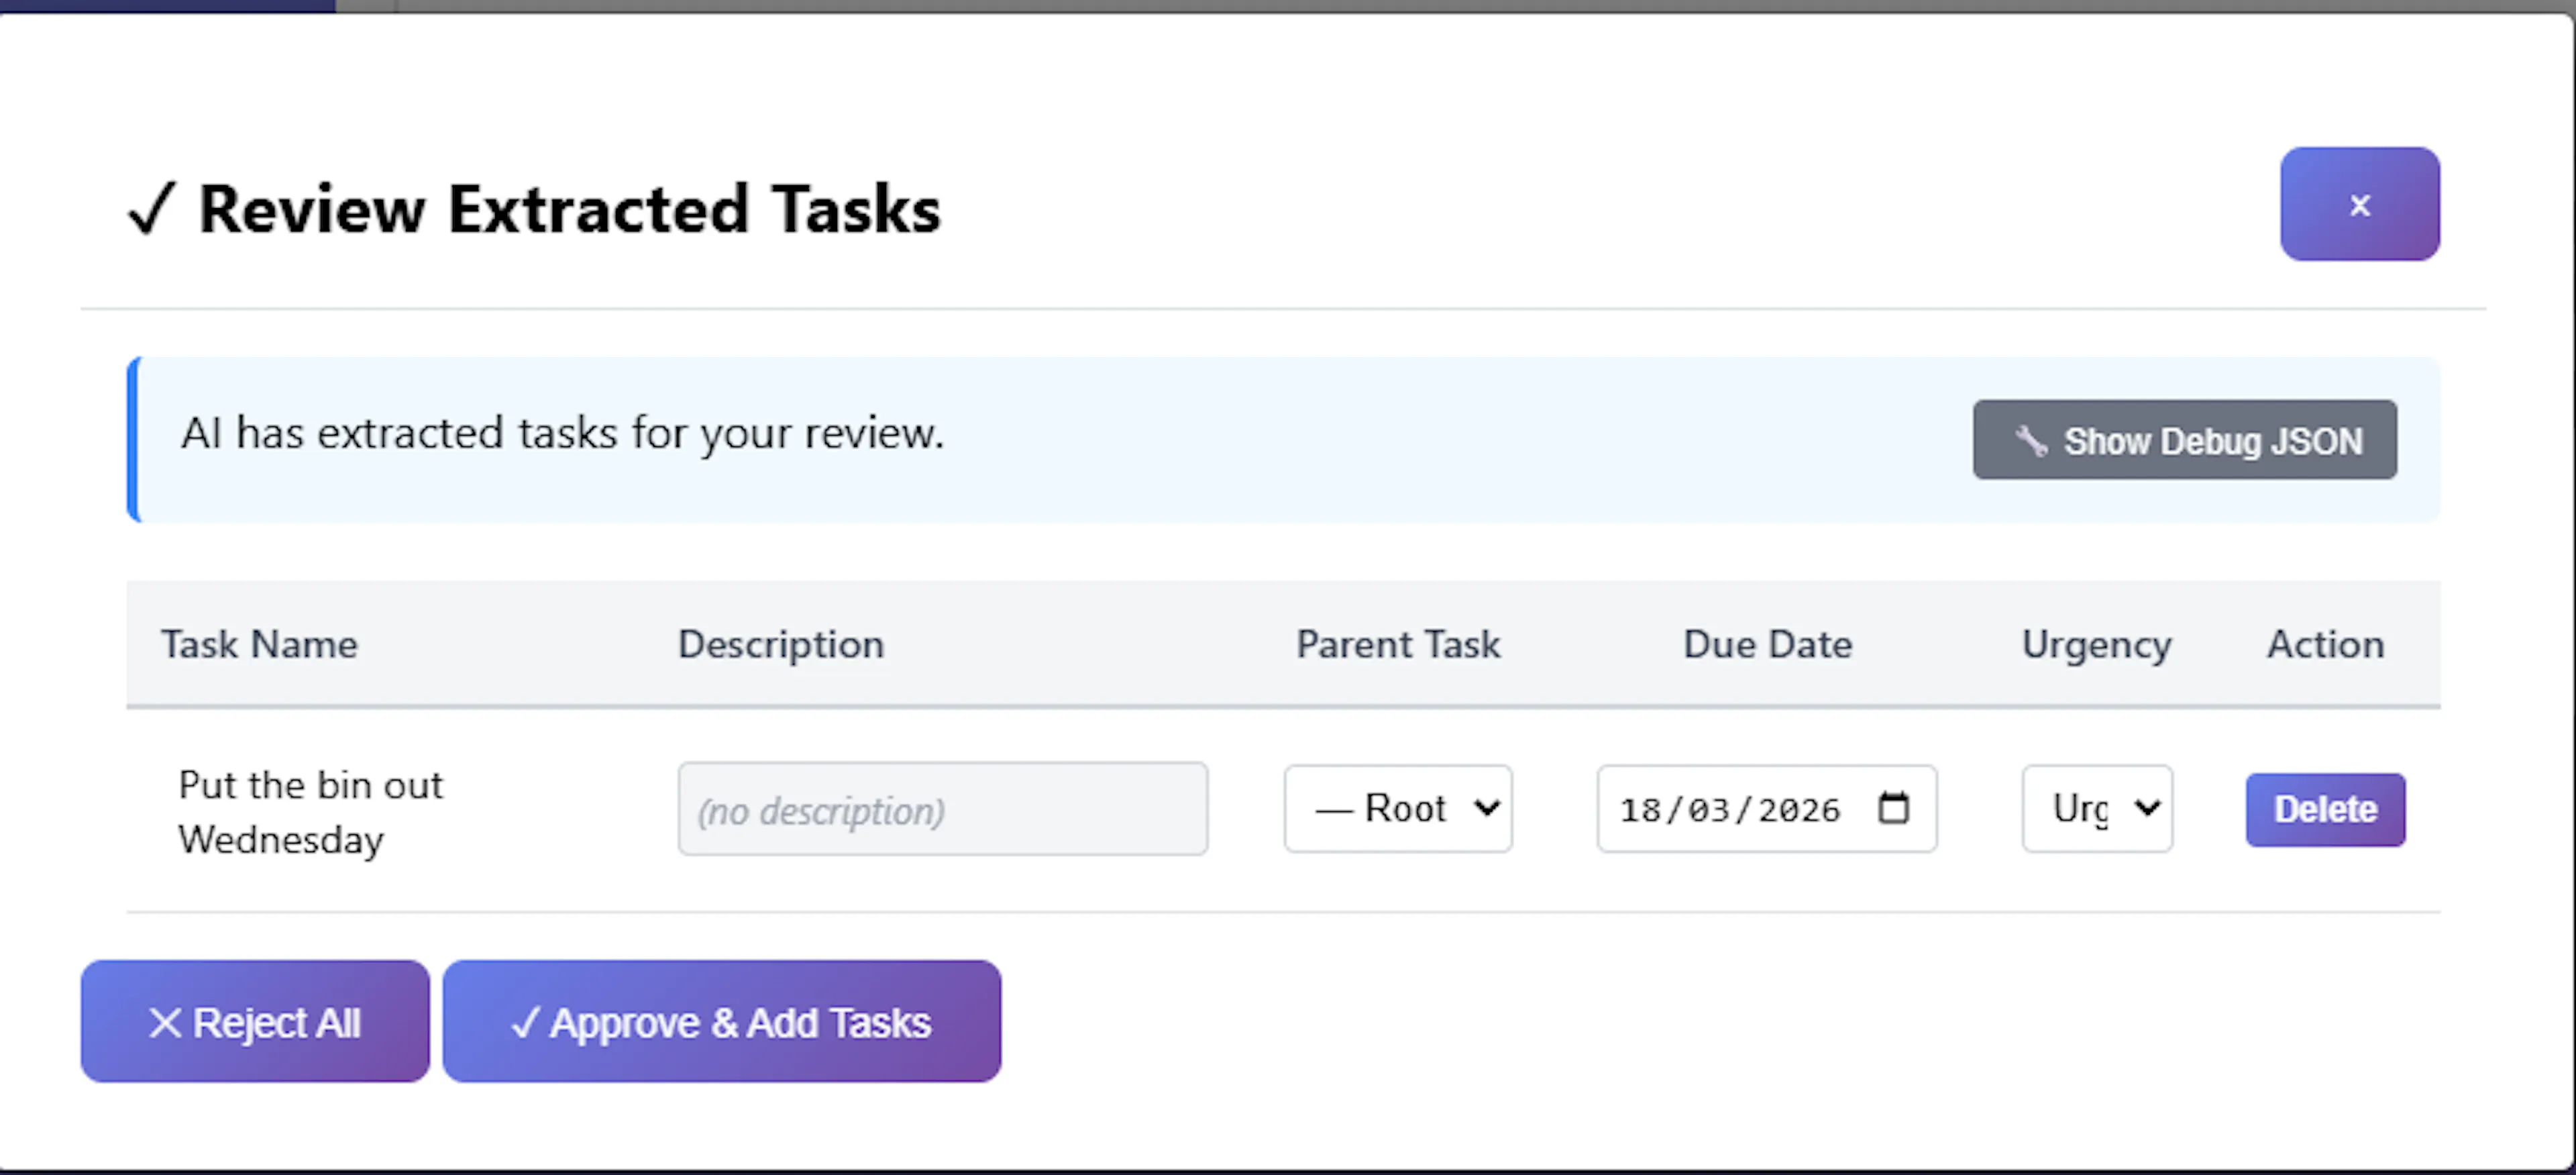
Approving the Task: When the approval screen appears, you can often just leave the extracted options exactly as they are. The AI is designed to automatically detect the correct date (the upcoming Wednesday) and the priority (Urgent) from your phrasing.
However, before finalizing, you have full control to alter the extracted details directly in the review table:
-
Task Name: You can click into the text box to edit the generated name.
-
Task Hierarchy: By default, it will be created as a Root Task. If you prefer, you can use the dropdown menu to select an existing task, adding this new item as a child (sub-task) instead.
-
Date & Urgency: You can manually override the AI's interpreted Due Date or Priority Level using the inline selector fields.
Once you are satisfied with the task's structure, simply click the Approve and Add Tasks button. The AI-generated task will immediately be saved and added to your main task list.
Important Note: While highly advanced, this process is not infallible. On occasion, the AI might incorrectly select a date. We continue to refine the rules associated with this system, but please always double-check that your dates are correctly assigned.
We now have two task entries in our session. In the next section, we will learn about the task list and how to manage these entries.
Here is how you can get started with the most common task creation workflow: